No Products in the Cart


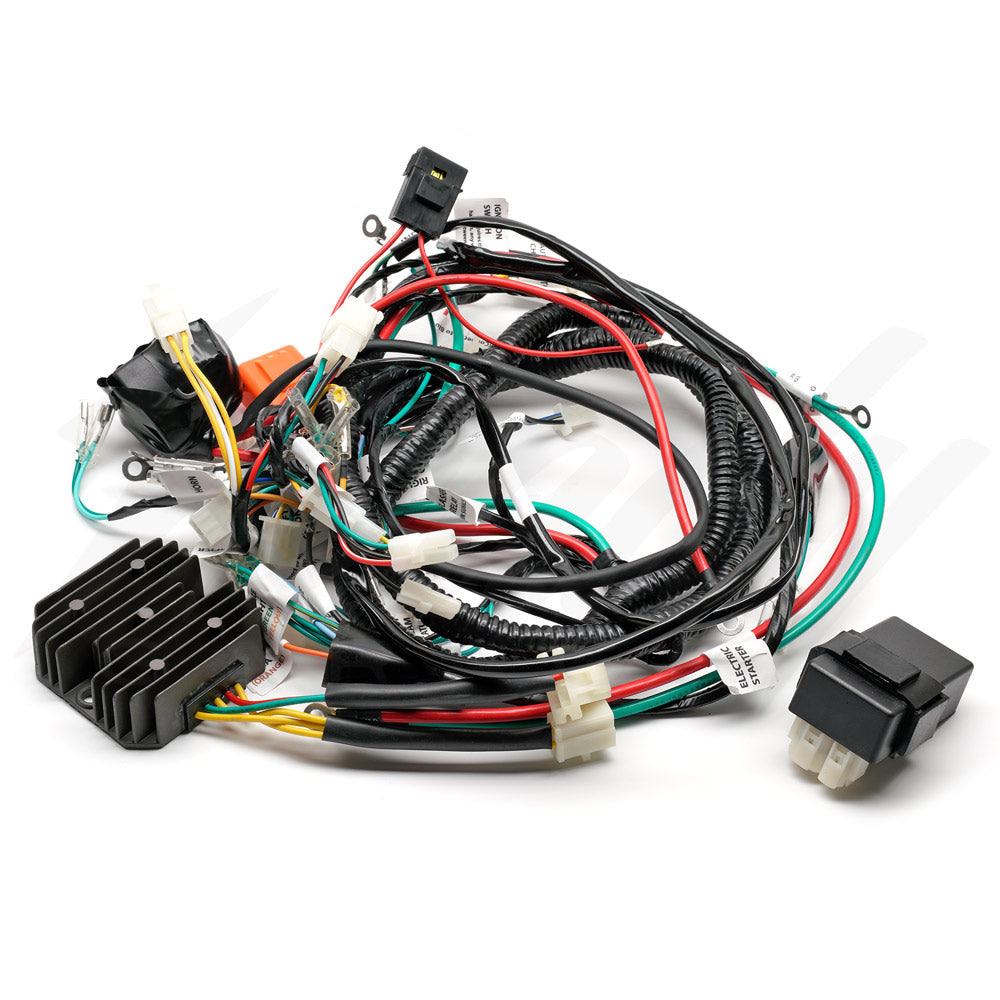
The ATR Plug-and-Play GY6 Engine Swap Harness takes the guesswork and frustration out of wiring your Honda Ruckus engine swap. Designed to simplify the installation process and reduce the likelihood of wiring errors, each harness is pre-labeled, assembled, and ready for installation.
The latest version is the 5th Generation (G5) Harness, which has been updated to utilize a DC CDI system. By eliminating the engine kill relay found on previous generations, the G5 harness offers a simpler, more reliable electrical system with fewer potential failure points.
Please take a few minutes to review the information below to familiarize yourself with the harness and its features before installation.
For the best charging performance, we highly recommend using an 11-pole stator system. Compared to the older 8-pole charging system, the 11-pole setup provides increased charging output and improved voltage stability. Converting to an 11-pole system only requires an 11-pole stator and a compatible flywheel/magneto.
Every ATR 5th Generation Harness is professionally hand-built using all-new wires, terminals, and connectors. Unlike modified OEM or donor harnesses, there are no wire color changes, splices, or jumper wires hidden within the loom. Each circuit maintains a consistent wire color from end to end, making installation, troubleshooting, and future servicing significantly easier.
The result is a harness that is approximately 95% plug-and-play, requiring only a few minor connections to complete the installation.
When using this harness, the factory Honda Ruckus ECU and electric fuel pump are no longer required. A vacuum fuel pump such as the Mikuni DF-44 must be used with your carbureted GY6 setup.
We also recommend retaining the OEM one-way fuel check valve to prevent fuel from draining back into the tank during extended periods of parking or storage.
The factory Honda Ruckus handlebar controls plug directly into the ATR harness, allowing all OEM switch functions to operate just as they would from the factory.
The G5 harness utilizes a DC CDI system, eliminating the need for the engine kill relay ("ice cube" relay) used on previous generations. This simplifies the electrical system and improves long-term reliability.
Another major benefit is compatibility with both AC and DC stators. Unlike older harnesses that required specific stator configurations, the G5 harness can operate with either style.
When using an AC stator with the G5 harness, only the timing pickup wire (typically Red/White or Blue/White) is required. The loose Black/Red wire will not be used. The charging circuits on AC and DC stators are identical, allowing either stator type to function properly with the G5 harness.
The additional 3-pin auxiliary connector running from the center of the chassis (near the factory fuel pump location) to the battery box area is included specifically for future accessories and upgrades.
These circuits can be utilized for:
By including these extra circuits within the harness from the beginning, future modifications can be completed without cutting, opening, or reworking the main harness.
The ATR G5 Harness was designed to provide a clean, reliable, and professional solution for GY6 swapped Honda Ruckus builds, allowing you to spend less time troubleshooting wiring and more time enjoying your project.
Steady Garage installation tips:
Initial installation
We recommend installing the harness first and performing an initial test start using the factory controls before installing additional accessories. Confirming proper operation early in the installation process will make troubleshooting significantly easier should any issues arise.
The ignition switch wires will need to be connected to the OEM ignition switch connector. Wire color orientation does not matter, as either wire can be connected to either terminal. For convenience, an optional ignition switch connector kit can be added to your order—please select this option from the drop-down menu if needed.
Low Fuel Indicator Function
For those wishing to retain the factory low-fuel warning light, the original LED driver unit (black box located beneath the indicator cluster) and the resistor module (silver rectangular box mounted beneath the original ECU location) must remain installed. The fuel level sender connector from the OEM harness will need to be transferred to the ATR harness. To do this, cut the fuel sender connector from the original harness while leaving enough wire length for a pigtail, then connect it to the ATR harness by matching the wire colors accordingly.
Harness Routing
As with any wiring installation, taking extra time to properly route and organize the harness within the battery box will result in a cleaner installation and make future servicing easier.
Ground Connection
The large ground wire leading toward the engine must be connected directly to the engine case and not to the rear frame. Failure to properly ground the harness to the engine may result in electrical issues or damage to the harness and related components.
CDI Compatibility
DO NOT USE AN AC CDI. This harness is designed for use with a DC CDI only. Installing an AC CDI may result in immediate damage to the CDI unit.
Fuel Check Valve Recommendation
We highly recommend using the OEM one-way fuel check valve (SKU: HND-1031) between the fuel pump and carburetor. This helps prevent fuel from draining back into the fuel tank after extended periods of parking or storage, reducing start-up issues.